Behind the Build: Crafting a 60" Corbel Round Dining Table
Every piece of furniture we make at The Woodhills starts with raw wood, a rendering, and a clear vision. One of our recent builds — a 60" Corbel Round Dining Table heading to a new home in South Carolina — is a great example of the detail, care, and craftsmanship that goes into each project.
Here’s a look at how we brought it to life — step by step.
Building the Base: It All Starts with the Core
Before anything can be assembled, we begin by gluing up the individual components for the base:
-
Middle post (1 piece)
-
Corbel legs (4 pieces)
-
Bottom feet (2 pieces)
-
Top cross support (what we call the "top X")
We let the wood fully dry and settle over a couple of days before moving forward — patience here pays off in strength and long-term durability.
Precision Cuts and Shaping
Once the glue has cured:
-
We load the corbel pieces onto our CNC machine, which cuts their signature “C” shape — that classic corbel curve that gives the table its traditional character.


-
The middle post is trimmed to our desired height and thickness, then we add visual interest by cutting 45° angles down the sides on the table saw — a small detail that adds dimension and polish.
-
For the bottom feet, we trace our custom shape using jigs, then cut each piece out on the bandsaw by hand. Afterward, we used a spindle sander to smoothen out the curves and sand everything smooth with 120-grit to remove any tool marks and prep for finishing.

Creating the 60” Round Top
The top starts with hand-selecting boards that will be strong, stable, and beautiful when joined together.


Once we have the pieces, we begin the process:
-
Jointing and planing each board until the edges are straight and the faces are flat.
-
Gluing and clamping the center boards first, then the outer boards after the center has cured — this helps us maintain the perfect round shape.
-
Once dried, we place the top on the CNC again to flatten and cut the 60" circle precisely.
-
Then it’s on to sanding — first with 80-grit, then 120-grit, smoothing both the top and underside.
-
Finally, we route the edges (a clean, rounded detail that softens the look and feel).

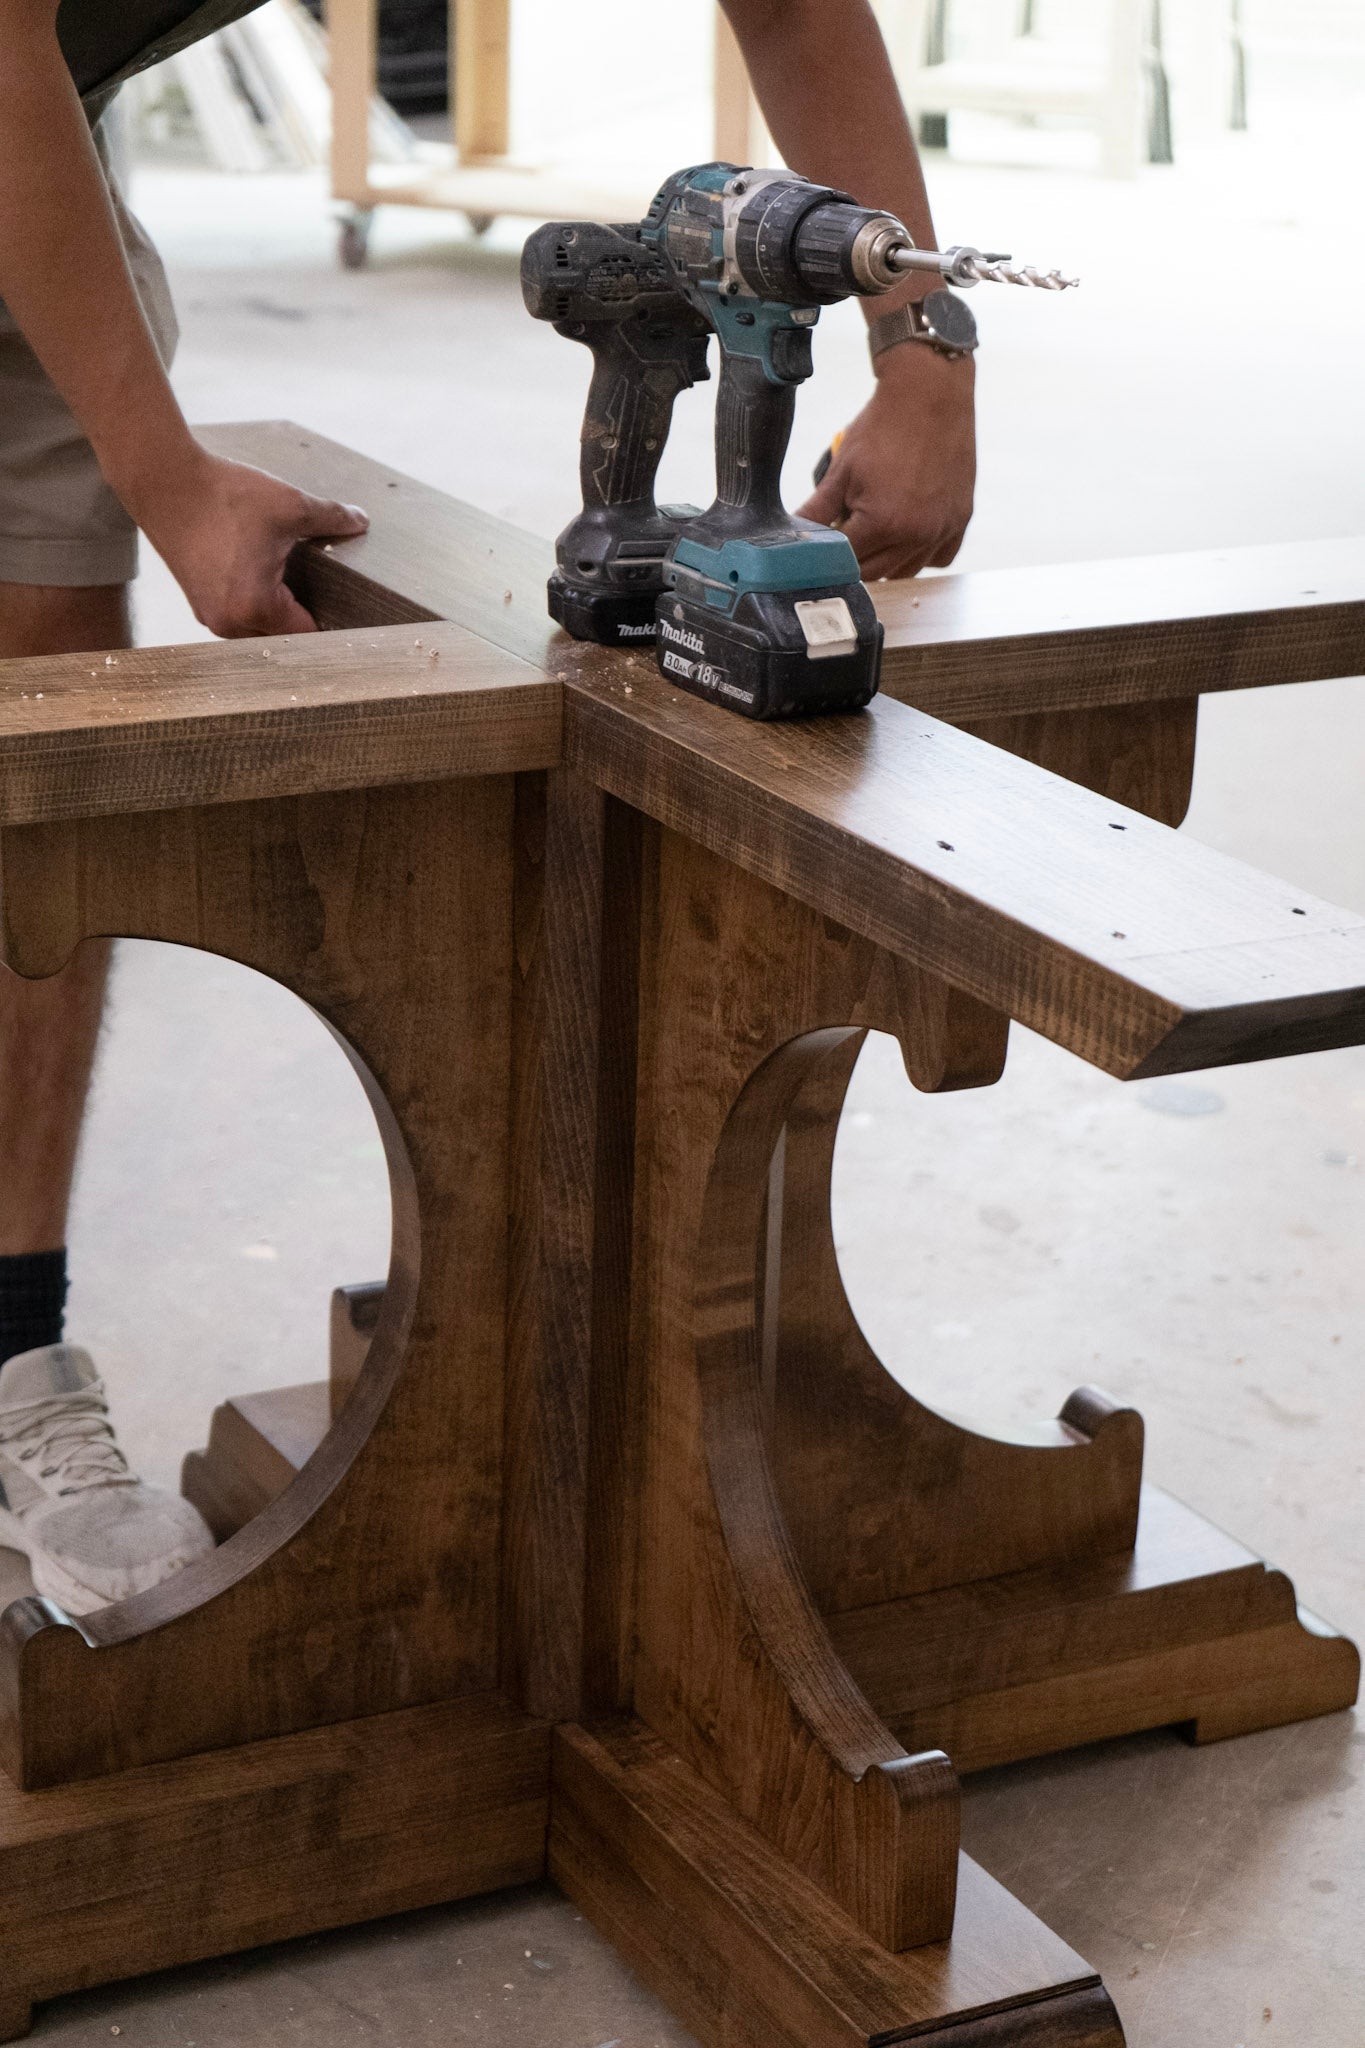
Stain, Lacquer, and Final Assembly
With all the parts ready, it’s time to bring them to life.
We apply Dark Walnut stain, as requested, which brings out the rich grain and warm tone of the wood. Then we spray 4 coats of lacquer, carefully sanding between each coat by hand to get a smooth, even finish.


Once dry, we assemble the base:
-
Attach the bottom feet
-
Add the middle post
-
Install the corbel arms on all four sides
-
Finish with the top X support
The top is then aligned, marked for perfect placement, and ready for our delivery driver to install securely on-site.


Wrapped, Protected, and Ready for Its New Home
Before shipping, we take extra care to wrap everything in thick blankets and plastic to prevent any movement or damage in transit. It’s heading out to its new home in South Carolina, where it’ll serve as a beautiful centerpiece for years to come.
Want a Custom Table Like This?
We design and build every table with intention, care, and craftsmanship — whether it's for a cozy breakfast nook or a formal dining space.
If you’re dreaming of a custom piece like this, reach out here, and we’ll walk you through the process.


Leave a comment