Crafting the Milestone Dining Table – A Custom White Oak Story
Every project has a story, and this one started at church.
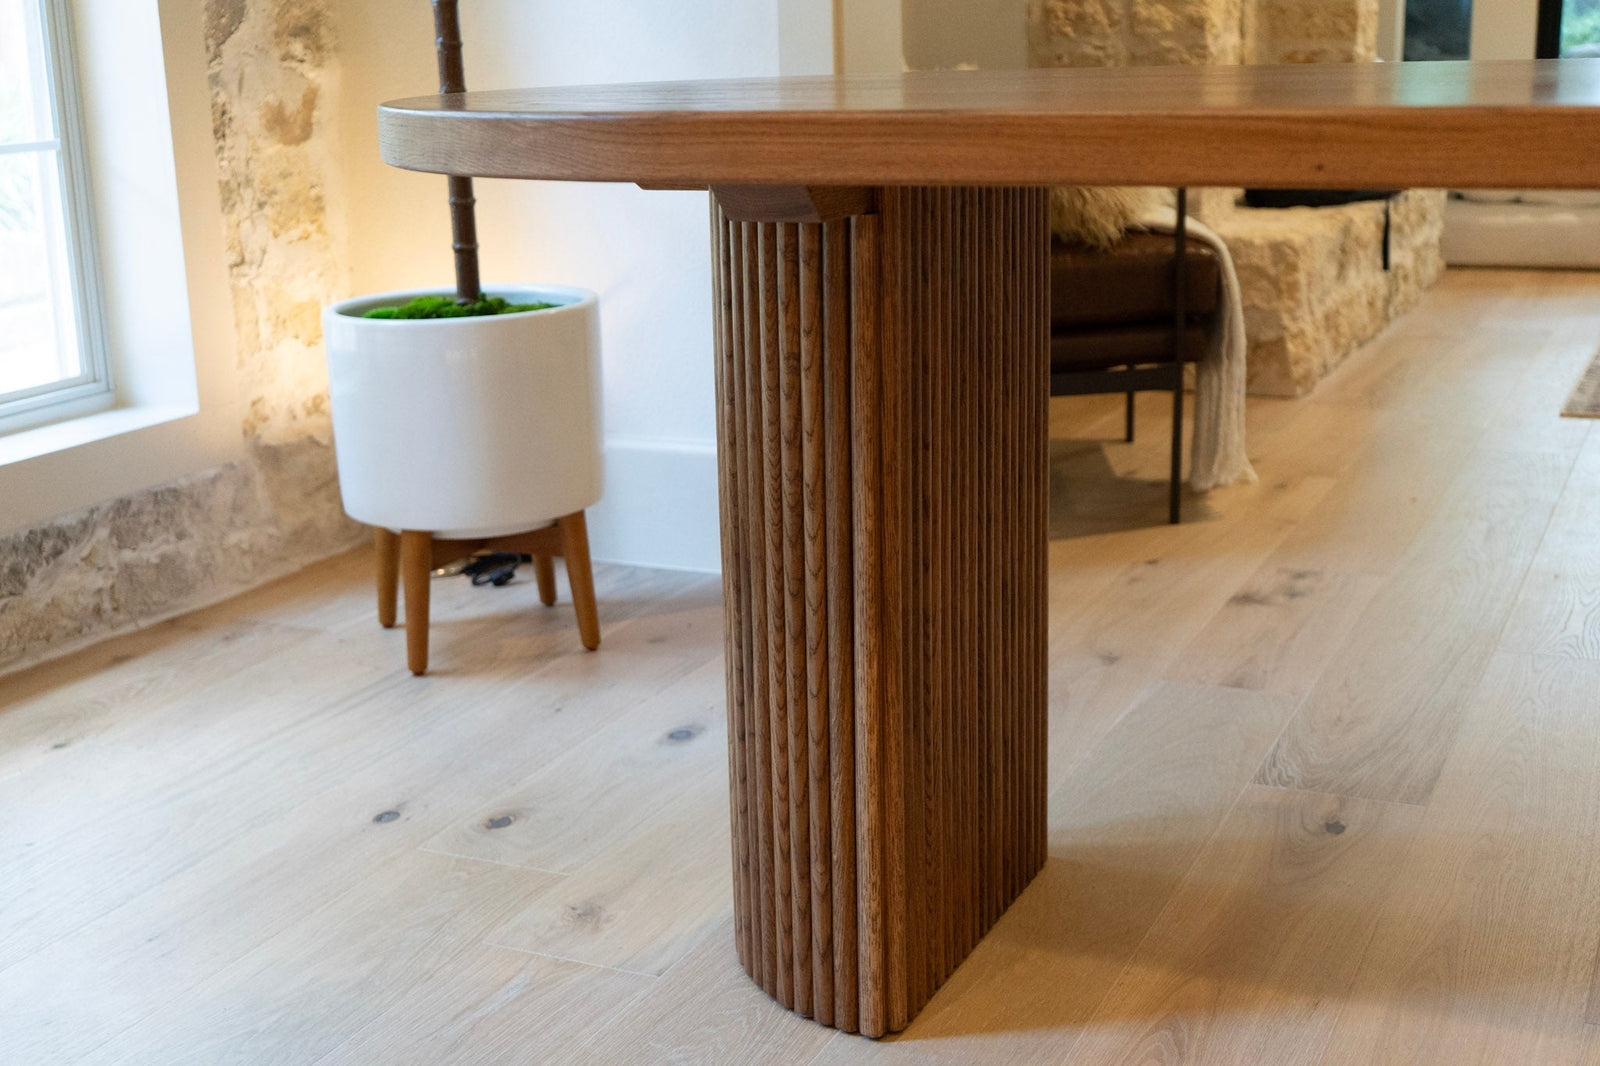
We first met Blake at Milestone Church, and after chatting for a bit, he mentioned he was remodeling a home and looking for a custom dining table. His vision? A white oak oval top sitting on two fluted half-cylinder bases.
We said, “Absolutely—we’d love to build that.”
Building the Top
We started with the table top. Since Blake wanted an oval—or more like a pill-shaped—design, we glued up a large rectangular panel from solid white oak, making the ends slightly shorter to save on materials while still achieving the full oval once cut.
After the glue-up cured, we loaded it onto our CNC machine, flattened the surface perfectly, and then cut it down to its final pill shape.
A few hours later, the top was ready for sanding.
Angel took care of this part—he sanded both the top and bottom until the whole thing felt seamless and buttery smooth. No shortcuts.


Choosing the Finish
Before we even began building, we gave Blake a box of 11 white oak samples so he could choose the perfect tone. He landed on Special Walnut, one of my personal favorites—it brings out the warmth and richness of the white oak without muting the grain.
Once stained, we sealed the top with 3 coats of lacquer, sanding lightly between coats for a super smooth, durable finish.

Building the Fluted Bases
Now for the fun part—the fluted half-cylinder bases.
To create those, I cut about 108 individual flutes, each roughly 29” long and 7/8” thick, all from solid white oak. Then we ran each one through our shaper fitted with a bullnose cutter to give them that signature rounded flute shape.

Once they were milled, we spent a few hours hand-sanding every flute until they were silky smooth. No rough edges, no sharp ridges—just clean, sculpted curves.

Then came the base assembly.
I built what I’d describe as a 3-tiered internal frame—think of it as the skeletal support that gives the base its structure and curve. You could call it a “ribbed form” or “segmented template,” but honestly, I just think of it as the bones of the base.

Using a thin layer of wood glue, I started placing each flute one by one against the frame, checking alignment as I went. Once in place, I secured each flute with three pin nails—at the top, middle, and bottom—where they touched the frame. I always start from the flat side and work my way around for even spacing and symmetry.

When both bases were fully wrapped in flutes, I went back and filled in any knots or imperfections, gave everything another round of sanding, and then stained them to match the tabletop in Special Walnut. Finally, we sealed them with lacquer to lock in the finish.


The Final Piece
After everything was dry, cured, and double-checked, it was time for the table to head to its new home.
The final piece was a showstopper—a clean, modern statement with organic curves, natural texture, and that timeless white oak warmth. It’s one of those builds we’re really proud of—not just for the way it turned out, but for the process it took to get there.

Blake had a vision.
We brought it to life—one flute, one board, one coat at a time.
— David


Leave a comment